
Learning how to install Ring doorbell hardware is easier than most people expect. A battery model can be on your door frame in about 20 minutes with nothing more than a screwdriver, and a wired model takes only a little longer if you already have a doorbell button and chime. The trick is knowing which method fits your home before you start drilling.
This guide covers Ring doorbell installation for both battery and wired models. You will learn what tools you need, how to set the doorbell up in the Ring app, how to mount it on wood, brick or stucco, and how to connect it to your existing doorbell wiring safely. We also cover the voltage numbers that trip up a lot of first time installers.
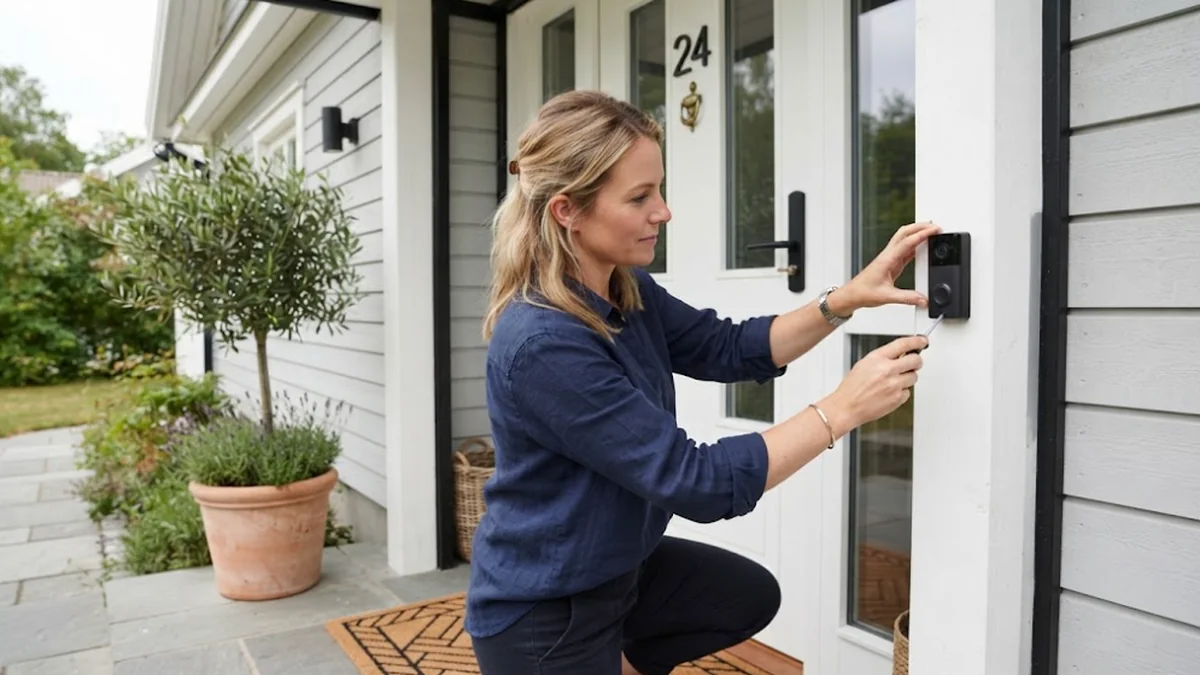
Table of Contents
- Battery or Wired: Choose Your Installation Method
- Tools and Parts You Need
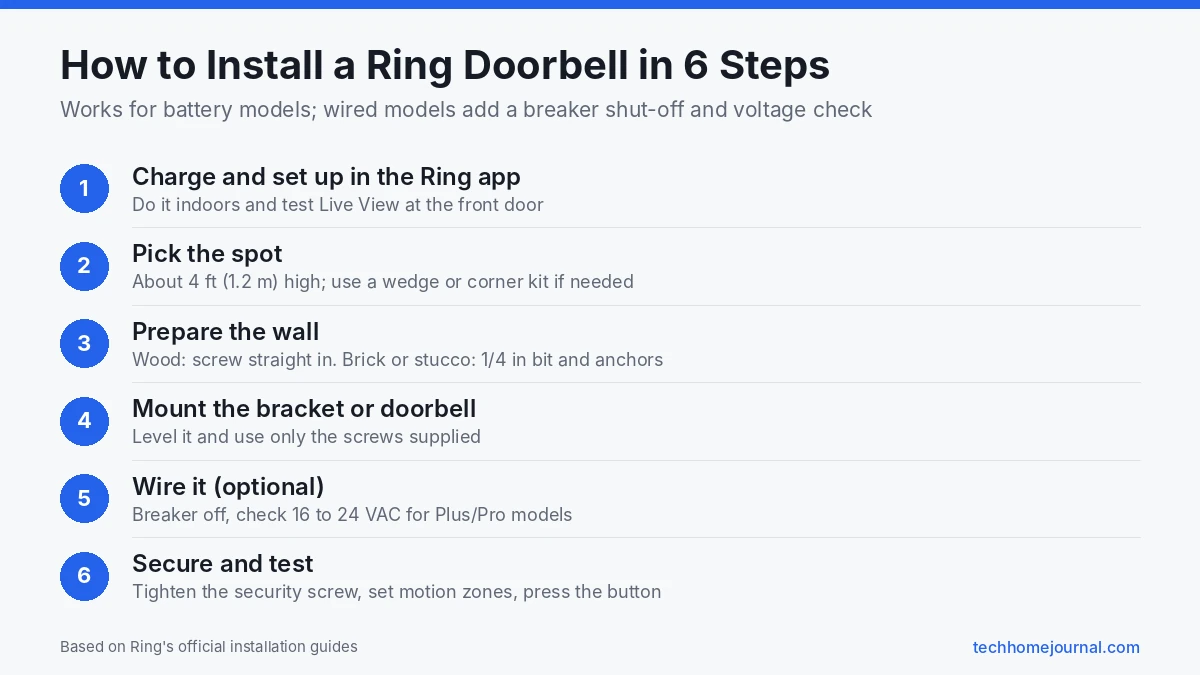
- Step 1: Charge and Set Up in the Ring App First
- Step 2: Pick the Right Spot and Height
- Step 3: Mount a Battery Ring Doorbell
- Step 4: Install a Wired Ring Doorbell
- Ring Doorbell Voltage Requirements
- Step 5: Finish Setup and Test
- Common Ring Doorbell Installation Problems
- Renter-Friendly and No-Drill Options
- Best Settings to Change After Installation
- Frequently Asked Questions
- Final Thoughts
Battery or Wired: Choose Your Installation Method
Every Ring doorbell falls into one of two groups, and that choice decides how you install it.
If your chime is too quiet or you want a different tone, see our guide to changing the Ring doorbell sound.
| Battery Ring doorbells | Wired Ring doorbells | |
|---|---|---|
| Power | Rechargeable battery (optional wiring) | Existing doorbell wiring or plug-in adapter |
| Install time | About 15 to 30 minutes | About 30 to 60 minutes |
| Needs existing doorbell wires | No | Yes (or a Ring plug-in adapter) |
| Rings your indoor chime | Only if hardwired, or with a Ring Chime | Yes, on most models |
| Best for | Renters, homes without doorbell wiring | Homeowners with a working doorbell |
If you rent, have no doorbell wiring, or simply do not want to touch electrical wires, a battery model is the simple choice. If you already have a wired doorbell and want constant power with no recharging, choose a wired model. Our guide to the best smart doorbells compares options from Ring and other brands if you have not bought one yet.
Tools and Parts You Need
Ring includes most of what you need in the box. Ring’s official battery doorbell installation guide lists the following:
- Phillips screwdriver. Ring includes a small screwdriver bit with most doorbells, but a full size screwdriver is easier to use.
- Drill with a 1/4 inch (6 mm) masonry bit. Only needed for brick, concrete or stucco walls.
- Mounting screws and anchors. These come in labeled bags in the box.
- Security screw and tool. This locks the faceplate or doorbell to its bracket.
- Level. Some Ring models have a built-in level; otherwise use your own.
- Wedge or corner kit. Included with some models, and useful when your door is set back or the button faces a wall.
For wired models you will also want a voltage tester, wire nuts or the included wire extenders, and access to your breaker panel.
Before connecting wires, review this doorbell wiring diagram.
Step 1: Charge and Set Up in the Ring App First
Do this indoors before you climb any ladder or drill any holes. Setting up first confirms your Wi-Fi signal reaches the door.
- Charge the battery. For removable battery models, charge until only the green light stays on. For models with a built-in battery, charge over USB until the light ring is fully lit. A full charge can take several hours.
- Download the Ring app and create or sign in to your account.
- Tap Set Up a Device, choose Doorbells, and scan the QR code on the back of the device or on the box.
- Connect to Wi-Fi. Most Ring doorbells use the 2.4 GHz band, and some newer models also support 5 GHz.
- Stand at your front door and open Live View. If the video stutters, your router may be too far away. A Ring Chime Pro or a mesh Wi-Fi node near the door usually fixes this; our home network setup guide explains your options.
Step 2: Pick the Right Spot and Height
Ring recommends mounting your doorbell about 4 feet (1.2 meters) above the ground. That height captures faces clearly and gives a good view of packages left on the step.
A few placement tips:
- Avoid pointing the camera straight at a busy street, since passing cars trigger extra motion alerts.
- If your door sits in a deep porch, use the wedge kit to angle the camera toward the walkway.
- If the doorbell sits on a wall next to the door, the corner kit turns it to face visitors.
- Strong backlight can wash out faces. A little shade over the door helps.
Step 3: Mount a Battery Ring Doorbell
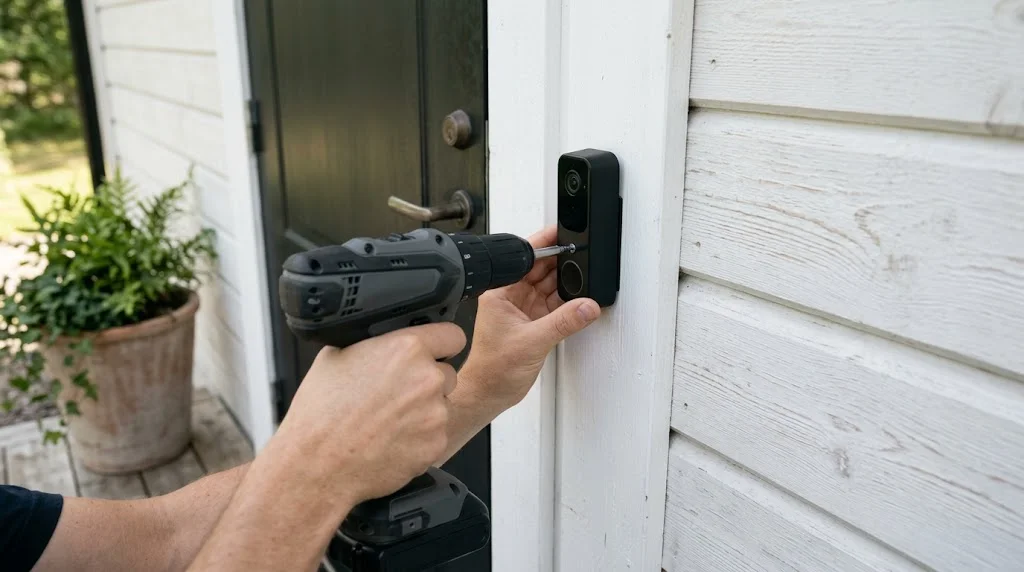
- Hold the mounting bracket in place and use the level to straighten it. Mark the screw holes with a pencil.
- On wood siding or trim, you can drive the screws straight in without drilling.
- On brick, concrete or stucco, drill pilot holes with the 1/4 inch masonry bit and tap in the plastic anchors.
- Fit the wedge or corner kit first if you are using one.
- Screw the bracket or doorbell to the wall. For removable battery models, take the battery out before mounting, then put it back once the unit is on the wall.
- Attach the faceplate or press the doorbell onto its bracket until it sits flush.
- Tighten the security screw at the bottom with the included tool.
Use only the screws that came with the doorbell. Ring warns that using the wrong screws can damage the battery and create a fire hazard.
Step 4: Install a Wired Ring Doorbell
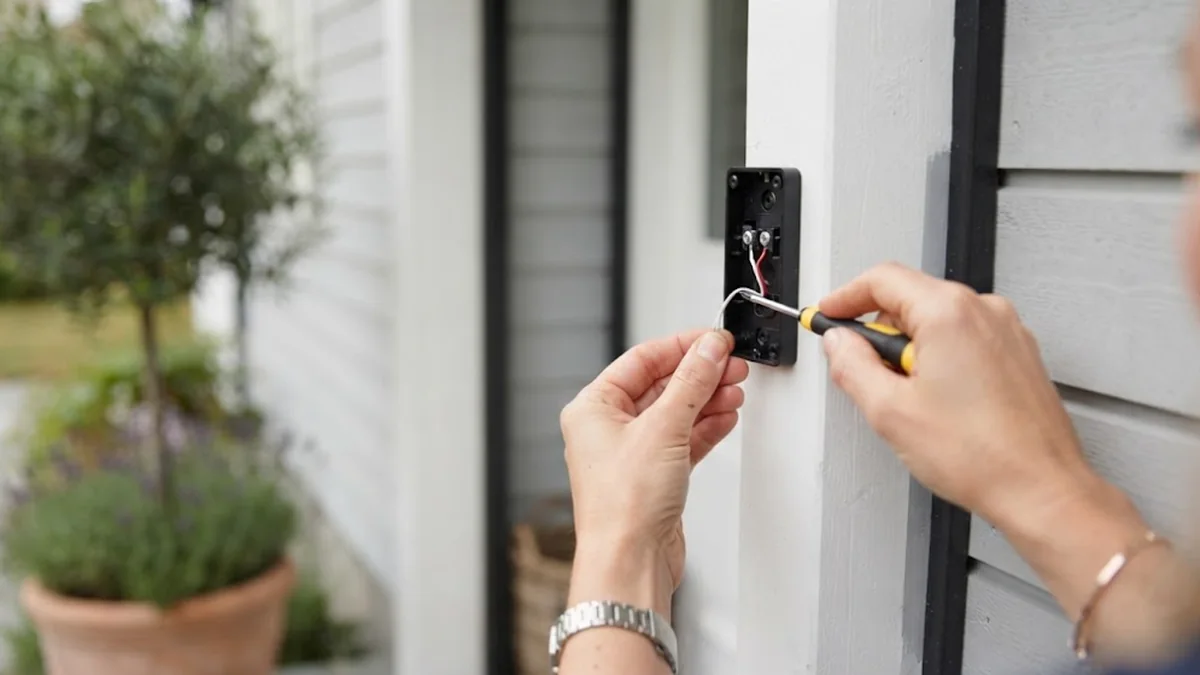
Wired Ring doorbell installation replaces your existing doorbell button. Ring’s own Wired Doorbell Plus installation article has model specific diagrams if you want to follow along. Take your time with this part.
- Turn off the power to your doorbell at the breaker. If you are not sure which breaker it is, turn off the main breaker.
- Remove the old doorbell button. Unscrew it from the wall and loosen the two wires behind it.
- Check the transformer voltage. Wired Ring doorbells need enough power to work properly. See the table in the next section.
- Install the Pro Power Kit if your model needs one. For the Wired Doorbell Plus and Wired Doorbell Pro, Ring requires a Pro Power Kit inside your indoor chime box. It connects to the Front and Trans terminals and protects the chime.
- Mount the bracket over the doorbell wires, using anchors on masonry.
- Connect the two doorbell wires to the terminal screws on the back of the doorbell or bracket. Doorbell wiring is low voltage AC, so polarity does not matter. Use the included wire extenders if the wires are too short.
- Attach the doorbell to the bracket and tighten the security screw.
- Turn the power back on and finish the setup in the Ring app, including the chime type (mechanical, digital or none).
If you are not comfortable with any of these steps, hire an electrician. Ring also notes that local building codes may require a licensed professional for electrical work.
Ring Doorbell Voltage Requirements
Low power from an old transformer is the most common reason a wired Ring doorbell keeps rebooting or the chime buzzes. These ranges come from Ring’s hardwiring guidelines:
| Ring doorbell model | Transformer voltage | Power rating |
|---|---|---|
| Battery doorbells (when hardwired) | 8 to 24 VAC | 5 to 40 VA |
| Video Doorbell Wired | 10 to 24 VAC | 8 to 40 VA |
| Wired Doorbell Plus and Pro | 16 to 24 VAC | 10 to 40 VA |
| Wired Doorbell 4K Pro | 16 to 24 VAC | 10 to 40 VA |
If your transformer is rated below these numbers, replace it with a compatible 16 or 24 VAC model or use Ring’s plug-in adapter. Our doorbell transformer guide shows how to find and test yours, and the doorbell chime guide explains mechanical versus digital chimes.
Using the Ring plug-in adapter
No doorbell wiring at all? The Ring Plug-In Adapter runs a thin cable from an indoor outlet through the wall to the doorbell. It works with battery doorbells and several wired models. When you use it, set the chime type to None in the app, because there is no indoor chime connected.
Step 5: Finish Setup and Test
Once the doorbell is on the wall, spend five minutes on settings:
- Press the button and confirm you get a phone alert and, if connected, your indoor chime rings.
- Set motion zones so the doorbell ignores the sidewalk and street.
- Adjust motion sensitivity and turn on people only alerts if your plan supports it.
- Check the battery level in Device Health if you have a battery model.
- Decide on recording. Without a subscription you get live view and alerts. Video history needs a Ring Home plan; see our guide to a doorbell camera with no subscription if you want to avoid monthly fees.
Ring explains its account protections, including two-step verification and end-to-end encryption, on its privacy page. Turning on two-step verification is a smart move for any camera on your front door.
Common Ring Doorbell Installation Problems
- Chime buzzes or hums. Usually low transformer power or a missing Pro Power Kit on Plus and Pro models.
- Doorbell keeps going offline. Weak Wi-Fi at the door. Add a Chime Pro or mesh node closer to the entrance.
- Battery drains in days. Too many motion events. Tighten motion zones and lower sensitivity.
- Doorbell will not power on after wiring. Check that the breaker is on and the wires are tight. Measure the transformer output.
- Bracket will not sit flat. Siding is uneven. Use the wedge kit or a small mounting block.
For more help after installation, read our home security camera setup guide, which covers motion settings that apply to doorbells too.
Renter-Friendly and No-Drill Options
If you rent, live in a flat, or simply don’t want holes in the door frame, you still have options:
- Ring No-Drill Mount: Ring sells an adhesive no-drill mount for some battery doorbells. It sticks to the door frame and holds the doorbell without screws. Check that the mount lists your exact model before ordering.
- Battery models only: wired doorbells need doorbell wires, so a no-drill setup only works with battery-powered Ring doorbells.
- Ring Chime or Chime Pro: without wiring, you won’t hear the old indoor chime. A plug-in Ring Chime plays the doorbell sound inside, and the Chime Pro also extends Wi-Fi to the front door.
- Ask first: many rental agreements and building rules cover front-door devices and recording shared corridors. A quick message to your landlord avoids problems later.
When you move out, the adhesive mount can usually be removed with dental floss or fishing line behind the pad, then any residue cleaned off with a little isopropyl alcohol.
Best Settings to Change After Installation
Once the doorbell is on the wall and online, spend ten minutes in the Ring app. These settings make the biggest difference day to day:
- Motion zones: draw zones around your path and step, not the street. This cuts alerts from passing cars and people.
- Motion sensitivity and frequency: start at the middle setting and adjust after a few days.
- Privacy zones: block out a neighbour’s door or window opposite yours.
- Modes: set motion alerts to stay quiet while you are home but active when you are away.
- Chime and notification sounds: choose a doorbell tone you will actually hear around the house.
- Quick Replies: pre-recorded messages, such as “Please leave the package at the door”, answer visitors when you can’t.
- Two-step verification: turn it on in Account settings to protect your video and account.
If the doorbell is part of a bigger setup, our guide to the best smart doorbells for home security compares Ring with other brands, and Ring’s own support centre lists model-specific settings.
Frequently Asked Questions
Can I install a Ring doorbell without existing wiring?
Yes. Any battery powered Ring doorbell can be installed without wiring. You can also use the Ring plug-in adapter to run power from an indoor outlet.
Is it hard to learn how to install Ring doorbell wiring myself?
No. If you can turn off a breaker and use a screwdriver, you can connect the two low voltage wires. The only tricky part is checking the transformer voltage, which takes a cheap multimeter.
Do I need an electrician to install a Ring doorbell?
Not for battery models. Many homeowners install wired models themselves because doorbell wiring is low voltage, but local codes vary. If you need to replace a transformer connected to household power, hiring an electrician is the safer choice.
How high should a Ring doorbell be mounted?
Ring recommends about 4 feet (1.2 meters) above the ground. This height gives a clear view of faces and packages.
Will a Ring doorbell work with my existing chime?
Most battery and wired models work with mechanical and digital chimes. The Wired Doorbell Plus and Pro need the Pro Power Kit. Some models, like the Wired Doorbell 2K Plus, do not work with existing chimes and need a Ring Chime instead.
Can I install a Ring doorbell on brick?
Yes. Drill pilot holes with a 1/4 inch masonry bit, insert the included anchors and screw the bracket in place.
How long does Ring doorbell installation take?
Most battery installs take 15 to 30 minutes, not counting charging time. Wired installs usually take 30 to 60 minutes.
Can I install a Ring doorbell in a flat or rented home?
Yes, with a battery model and a no-drill mount, as long as your lease or building rules allow it. Point the camera at your own door rather than a shared corridor where possible.
Do I need a Ring Chime with a battery doorbell?
Not to get alerts on your phone, but a Ring Chime lets you hear the doorbell inside the house without wiring. Some battery models can also connect to existing doorbell wires to ring the old chime and trickle-charge.
Why does my Ring doorbell keep going offline after installation?
Weak Wi-Fi at the front door is the usual cause, especially through brick, stone or a metal door. Check the signal strength in Device Health in the Ring app. Moving the router, adding a mesh node or using a Ring Chime Pro near the door often fixes it. On wired models, low transformer voltage can also cause drop-outs.
Final Thoughts
Once you know how to install Ring doorbell hardware, it is a beginner friendly project. Charge and set it up in the app first, mount it at about 4 feet, and use the right anchors for your wall. For wired models, turn off the power, check your transformer voltage and add the Pro Power Kit where needed. Do it in that order and your new doorbell should be watching the porch within the hour. If you also want light and video over the driveway, have a look at our Ring Floodlight Camera guide.