
The first cold night of the year is when most people remember their baseboard heaters exist. You turn the thermostat up, and within a few minutes the room smells faintly of burning dust. That smell is the clearest sign the heater needs a clean.
Cleaning baseboard heaters is not hard, and it doesn’t need special tools. But there are a couple of ways to get it wrong: bending the fins, skipping the breaker, or soaking parts that should stay dry. This guide walks through the whole job for both electric and hydronic (hot water) units, with the safety steps manufacturers actually put in their manuals.
Table of Contents
- Why cleaning baseboard heaters matters
- Electric vs hydronic baseboard heaters
- Tools and supplies you need
- Safety first: power off and cool down
- How to clean an electric baseboard heater, step by step
- How to clean a hydronic baseboard heater
- How to straighten bent fins
- How often to clean baseboard heaters
- Common mistakes to avoid
- Keeping baseboard heat efficient after cleaning
- FAQ
- Final thoughts
Why cleaning baseboard heaters matters
Baseboard heaters sit at floor level, which is exactly where dust, pet hair, crumbs and lint settle. Air moves through them by convection: cool air enters at the bottom, passes over the heating element and its fins, warms up and rises out the top. Anything that sits on those fins gets in the way of that airflow.
Here is what a dirty heater actually does to your home:
- It smells. Dust that lands on a hot element scorches. That is the “burning” smell many people notice when the heat first comes on in autumn. It is usually harmless, but it is unpleasant and it tells you the fins are coated.
- It heats less evenly. A thick layer of dust acts like a blanket on the fins. Less air passes through, so the room takes longer to warm up and the heater runs longer to hit the same temperature.
- It spreads dust around. Every heating cycle pushes some of that dust back into the room. If anyone in the house has allergies, a clean heater makes a noticeable difference.
- It can become a hazard. Lint, paper or pet hair packed against an element is not something you want in any heating appliance. Manufacturers ask you to keep the inside clear for a reason.
Stelpro, one of the bigger makers of electric baseboards, recommends cleaning them at least once a year because dust builds up so quickly at the base of walls. That lines up with what most heater manuals say.
Electric vs hydronic baseboard heaters
Before you start, figure out which type you have. The cleaning steps are similar, but the safety details are different.
Electric baseboard heaters have a heating element (a metal tube with a resistance wire inside) running the length of the unit, surrounded by thin aluminum fins. They are wired directly to a 120V or, more often, 240V circuit. Most are controlled either by a dial on the unit itself or by a wall-mounted line-voltage thermostat. If there is no water pipe going into the wall and the heater is controlled by a thermostat that clicks loudly, it is almost certainly electric.
Hydronic baseboard heaters are part of a boiler system. Hot water flows through a copper pipe with aluminum fins pressed onto it. You will usually see the pipe go through the wall or floor at each end, and there is often a small hinged flap (the damper) along the top that controls how much air flows through. Some newer “electric hydronic” units are sealed and filled with fluid, heated by an electric element. Those are cleaned like electric units from the outside, but you never open the sealed part.
| Feature | Electric baseboard | Hydronic baseboard |
|---|---|---|
| Heat source | Resistance element | Hot water from a boiler |
| What to switch off | Circuit breaker | Thermostat (and let pipes cool) |
| Fin material | Aluminum around element | Aluminum on copper pipe |
| Cover | Front panel, usually screws or clips | Front panel that lifts off, plus damper |
| Main cleaning risk | Electric shock, burns | Burns, bent fins |
Tools and supplies you need
You probably already own everything on this list.
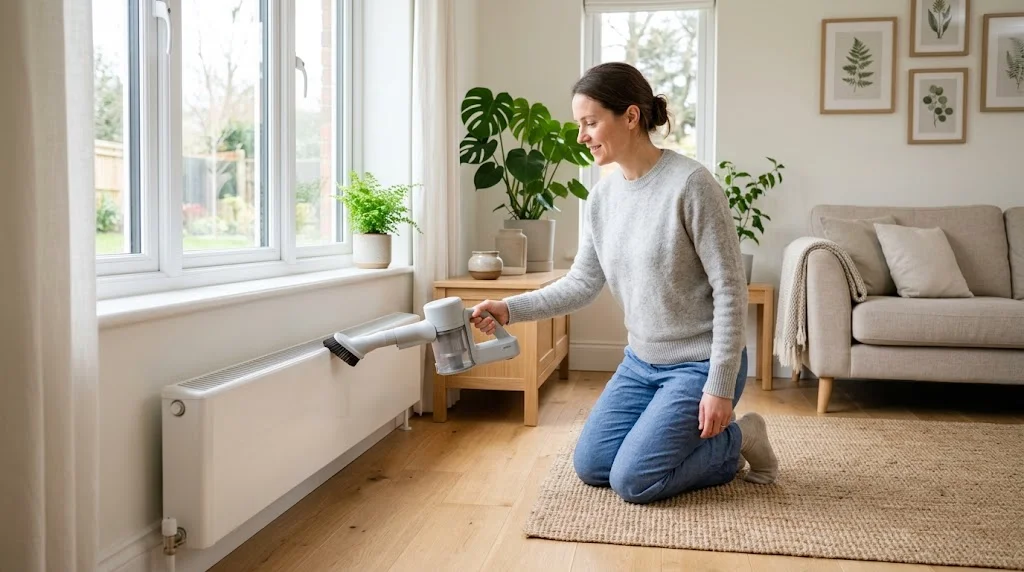
- A vacuum with a soft brush attachment. A small round dusting brush is ideal. A crevice tool helps for the corners and the gap behind the unit.
- A screwdriver. Usually a Phillips, for the front cover or end caps.
- A soft paintbrush or a clean makeup brush. Handy for flicking dust out from between fins before you vacuum.
- Microfiber cloths. One dry, one slightly damp.
- Mild dish soap and warm water. For the cover only.
- Work gloves. The fins are thin and sharp, and manufacturers specifically warn not to touch them with bare hands.
- A fin comb or a butter knife (optional). For straightening bent fins.
- Compressed air (optional). Useful for stubborn dust, but do it with a vacuum running nearby or the dust just moves to the next room.
- A non-contact voltage tester (optional but smart). A cheap pen-style tester lets you confirm an electric heater is actually off before you touch it.
Safety first: power off and cool down
This is the one step you can’t skip. The owner’s manual for INDEECO baseboard heaters tells you to turn off power at the circuit breaker panel before cleaning and to wait for the housing and element to cool. Stelpro gives the same advice. Turning the thermostat down is not enough on an electric heater, because many line-voltage thermostats only break one leg of a 240V circuit. The heater looks off, but part of it can still be live.
- Find the right breaker. Baseboard heaters are usually on double-pole breakers (two switches tied together) labeled with the room name or “heat.” If your panel isn’t labeled, turn the heater on high, then flip breakers until it stops warming. Leave that one off.
- Test it. Hold a non-contact voltage tester near the wiring compartment at one end of the heater. No beep, no light, you are good to go.
- Let it cool. Give it at least 15 to 30 minutes. The element and fins hold heat longer than you think.
- For hydronic units, turn the thermostat for that zone all the way down and let the pipes cool. You don’t need to drain anything or touch the boiler.
If your home has a smart thermostat on a central system, remember that it does not control baseboard heaters. Baseboards use their own line-voltage controls. If you want to understand the difference, our guide on what a smart thermostat actually does explains low-voltage versus line-voltage systems.
How to clean an electric baseboard heater, step by step
Once the breaker is off and the unit has cooled, the job takes about 15 to 20 minutes per heater.
Step 1: Clear the area
Move furniture, curtains and anything else away from the heater. Put down an old towel along the floor to catch dust that falls out. This is also a good moment to vacuum the floor and the wall directly above the heater, where dust tends to streak.
Step 2: Remove the front cover
Most electric baseboards have a front panel held on by a few screws along the bottom or by clips at each end. Some models have a cover that lifts up and then pulls forward. Don’t force it. If it won’t budge, check for hidden screws under the end caps. Stelpro specifically warns to remove the cover gently rather than prying it.
Leave the end caps on if they cover the wiring. You don’t need to touch the wires to clean the heater, and you shouldn’t.
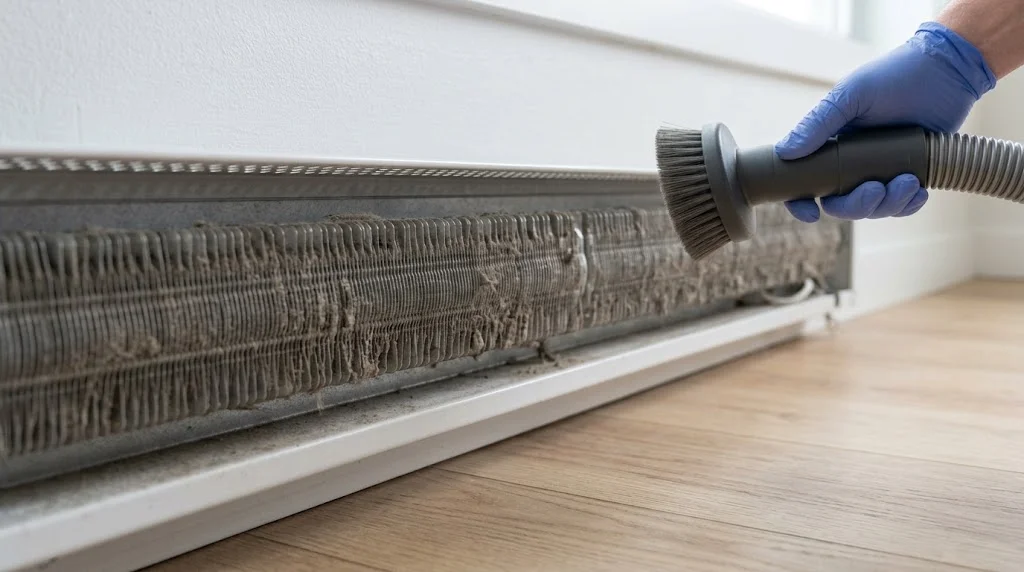
Step 3: Vacuum the fins
Put the soft brush attachment on the vacuum and run it slowly along the fins, following the direction of the fins (usually up and down, not side to side). Light pressure is enough. The fins are soft aluminum and bend easily, so let the suction do the work.
For dust stuck deep between fins, flick it loose with a soft paintbrush first and then vacuum it up. If you use compressed air, blow it in short bursts with the vacuum hose held right next to where you are spraying.
Step 4: Clean the inside of the housing
Use the crevice tool along the bottom tray of the heater and behind the element. Pet hair and lint collect here. Once the loose dust is gone, wipe the bottom tray with a dry or barely damp microfiber cloth. Never spray liquid into an electric heater, and never wipe the element or wiring with a wet cloth.
Step 5: Wash the cover
The front panel is the only part that can handle soap and water. Wipe it with a cloth dipped in warm water and a drop of dish soap, then dry it completely. For yellowed covers, a paste of baking soda and water on a soft cloth usually lifts the stain. Avoid abrasive pads; they scratch the paint and the bare metal will rust.
Step 6: Check the hardware
Before you put the cover back, look at the screws that hold the heater to the wall. Stelpro points out that overtightened wall screws can cause cracking or ticking noises as the metal expands and contracts. Loosening them slightly often fixes that. Also check that there’s a small gap between the heater and any wooden baseboard trim.
Step 7: Reassemble and restore power
Refit the cover, make sure every screw and clip is back, then turn the breaker on. Set the thermostat a few degrees above room temperature. A faint smell for the first few minutes is normal as any leftover dust burns off. A strong smell, smoke, or a buzzing sound means something is wrong; turn the breaker back off and call an electrician.
How to clean a hydronic baseboard heater
Hydronic units are a bit more forgiving because there is no exposed electrical element. The fins, however, are often longer and more tightly packed, so they trap more dust.
- Turn the zone thermostat down and wait for the pipes to cool to the touch.
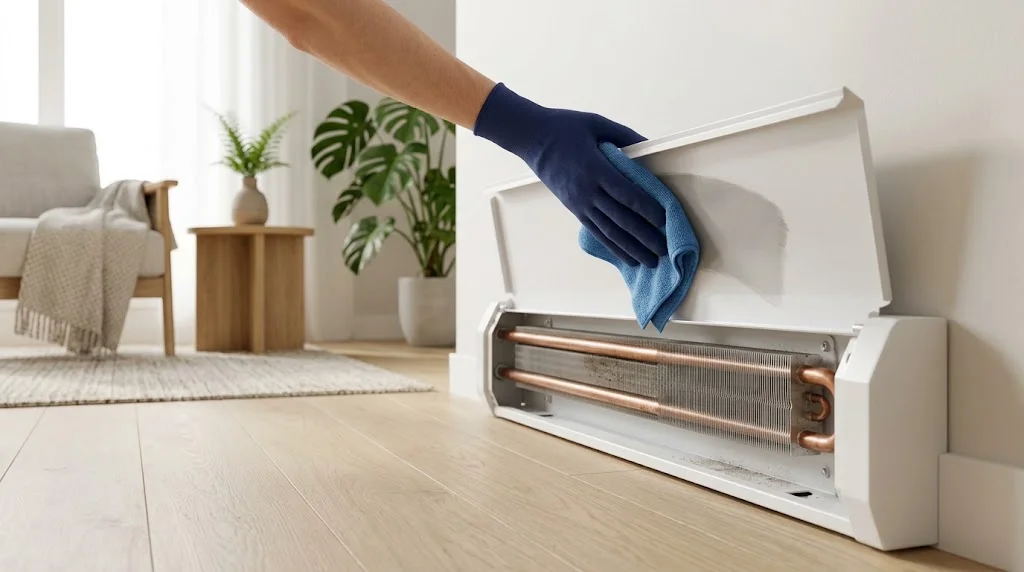
- Remove the front cover. On most hydronic baseboards, the front panel lifts up and off the back plate. Some have end caps that slide off first.
- Open the damper along the top, if your unit has one, so you can see down into the fins.
- Vacuum from above and below. Use the brush attachment along the top of the fins, then the crevice tool along the floor and behind the pipe. A long, narrow crevice tool reaches the back of the fins better than a round brush.
- Brush out what’s left. A thin bottle brush or radiator brush slides between fins and pushes trapped dust out the bottom.
- Wipe the cover and back plate. Hydronic covers can be washed with mild soapy water, since there’s nothing electric behind them. Dry everything before you put it back.
- Check for leaks. While the cover is off, look at the copper pipe joints at each end. Green crust or water stains on the floor mean a slow leak, which is a job for a plumber or heating tech.
If you already have water leak sensors around the house, hydronic baseboards are a good place to put one. Our guide on where to place water leak sensors covers the spots that matter most, and a smart water shut-off valve can stop a small leak before it ruins a floor.
How to straighten bent fins
Bent fins are very common, especially on heaters in kids’ rooms or behind furniture. A few bent fins won’t stop a heater from working, but large crushed sections block airflow and can make a rattling or ticking noise.
- Use a fin comb. These are sold for AC and radiator coils and are cheap. Pick the spacing that matches your fins, then slide it gently through the bent section.
- Or use a butter knife. Slide a dull knife between two fins and gently pry the bent one back into line. Work one fin at a time.
- Go slowly. Aluminum fins tear if you bend them back and forth too much. Get them “mostly straight” and stop.
- Wear gloves. The edges are sharp enough to cut. INDEECO’s BMI series manual carries a plain warning that the element fins are sharp and should not be touched.
On an electric heater, do this only with the breaker off. If a large section of fins is crushed flat against the element, it’s usually easier and safer to replace the heater. Basic electric baseboard heaters are not expensive, and a licensed electrician can swap one in less than an hour.
How often to clean baseboard heaters
The manufacturer baseline is once a year, ideally just before the heating season starts. In practice, some homes need it more often.
| Your home | Suggested cleaning schedule |
|---|---|
| Average home, no pets | Once a year, in early autumn |
| Pets that shed | Every 3 to 4 months during heating season |
| Allergies or asthma in the home | Before the season, then mid-winter |
| Carpeted rooms | Twice a year |
| After renovation or drywall work | Right after the work is finished |
Between deep cleans, run the vacuum brush along the top grille and the floor gap once a month during winter. It takes thirty seconds per heater and keeps the big clean easy.
Common mistakes to avoid
- Cleaning with the power on. Even if the heater feels cold, the element can still be live. Breaker off, every time.
- Using water or spray cleaners inside an electric unit. Liquid and electrical parts don’t mix. Only the removed cover gets washed.
- Scrubbing the fins. A stiff brush or a hard vacuum nozzle flattens them. Soft brush, light pressure.
- Forcing the cover. Bent covers rattle and may not sit flush, which changes how air flows. Look for the clips and screws.
- Putting furniture right back against it. The INDEECO manual asks for at least 3 inches of clearance between the front of the heater and combustibles like furniture, bedding and curtains. Long curtains should hang at least 1 inch above the top of the heater.
- Ignoring damage. Manufacturers are clear that a damaged heater, or one with missing parts, should not be used. If you find a cracked element, scorched wiring or a missing end cap, leave the breaker off and get it repaired.
Heating season is also a good time to check your detectors. If you use any fuel-burning appliances, read our guide on smart carbon monoxide detectors, and if a smoke alarm starts chirping when the heat comes on, our smoke detector beeping guide will help you sort it out.
Keeping baseboard heat efficient after cleaning
A clean heater works better, but it doesn’t change the basic economics of electric resistance heat. The U.S. Department of Energy notes that electric resistance heating turns all of its electricity into heat, yet it often costs more to run than other systems because of how electricity is generated and delivered. So once your heaters are clean, these habits help keep your bill down:
- Use a wall thermostat, not the dial on the heater. Built-in thermostats sit right next to the hot element and read the room badly. The DOE recommends a remote thermostat on an interior wall for more accurate control.
- Consider a smart line-voltage thermostat. Regular smart thermostats for furnaces won’t work with baseboards, but there are line-voltage models made for them that let you set schedules and control heat from your phone. Programmed setbacks at night and while you are out add up over a winter.
- Check the heater is the right size. An undersized heater runs nonstop and still leaves the room cold. Our free heater size calculator works out the wattage each room needs.
- Heat only the rooms you use. One of the few real advantages of baseboard heat is zone control. Keep guest rooms and storage rooms cooler.
- Seal the drafts. Cold air pouring off a leaky window right above a baseboard is wasted money. Our guide to insulating windows cheaply covers film kits, draft snakes and thermal curtains (hung clear of the heater).
- Track what heating actually costs. A home energy monitor shows exactly how much power your heaters draw, which makes it easier to see if a new schedule is working.
For more ways to cut winter bills, see our list of strategies to lower your electricity bill at home.
Heater size depends on room size. Get an exact figure with our free square footage calculator.
FAQ
Can I clean a baseboard heater without removing the cover?
You can do a quick surface clean by running a vacuum brush along the top and bottom openings. It removes loose dust but leaves most of what is stuck to the fins. For a proper clean once a year, take the cover off.
Why does my baseboard heater smell like burning?
Usually it is dust on the element burning off, especially the first time you use the heater each season. Cleaning the fins fixes it. If the smell is strong, smells like melting plastic, or comes with smoke or buzzing, turn the breaker off and have an electrician look at it.
Can I use a damp cloth on the fins?
On a hydronic unit with the pipes cool, a barely damp cloth on accessible areas is fine. On an electric unit, keep the inside dry. Use a vacuum and soft brush only, and wash just the removed cover.
Is compressed air safe for baseboard heaters?
Yes, with the power off. It is good for dust wedged deep in the fins. Use short bursts and hold a vacuum nozzle close by, otherwise the dust ends up on the floor and furniture.
How do I know if my baseboard heater is electric or hydronic?
Look at the ends. A hydronic heater has a copper pipe going into the wall or floor, and it is part of a boiler system. An electric heater has a wiring box at one end and no pipe. Electric units are also usually controlled by a line-voltage thermostat or a dial on the unit.
Can bent fins be fixed?
Yes. A fin comb or a dull butter knife can straighten most bent fins. Go slowly and wear gloves. If whole sections are crushed onto the element of an electric heater, replacement is often the better choice.
Does cleaning baseboard heaters save money?
It helps a little. A clean heater moves air more freely and warms the room faster, so it runs a bit less to reach the set temperature. The bigger savings come from a good thermostat, sensible schedules and sealing drafts.
Final thoughts
Cleaning baseboard heaters is a small job that pays off every winter. Turn the breaker off, let the heater cool, take the cover off gently, and vacuum the fins with a soft brush. Wash only the cover, check the hardware, and put everything back before you restore power. Do it once a year before the cold sets in, more often if you have pets, and keep furniture and curtains a few inches away.
Do that, and the first cold night of the year will just feel warm, without the burning-dust smell.